RC10B7 Manual: An Overview
This comprehensive guide details the RC10B7, covering assembly, electronic setup, tuning, and troubleshooting. It assists with optimizing performance and maintaining this advanced racing machine.
The RC10B7 represents a significant evolution in off-road buggy technology, building upon the legendary RC10 heritage; Designed for serious racers, this kit demands precision assembly and a thorough understanding of its adjustable features. This manual serves as your complete resource, guiding you through every step – from initial build to fine-tuning for optimal track performance.
Whether you’re a seasoned RC enthusiast or a dedicated newcomer, the RC10B7 offers a rewarding building and racing experience. Careful attention to detail during assembly is crucial, ensuring smooth operation and maximizing the buggy’s potential. This manual will detail each component, providing clear instructions and helpful tips. Understanding the interplay between suspension geometry, drivetrain configuration, and electronic settings is key to unlocking the RC10B7’s competitive edge. Prepare to delve into a world of precision engineering and high-speed excitement!
Key Features and Specifications
The RC10B7 boasts a redesigned chassis crafted from 7075-T6 aluminum, enhancing durability and weight distribution. It features a modular suspension system allowing for versatile geometry adjustments, catering to diverse track conditions. A high-capacity shock design provides consistent damping, while the optimized steering system delivers precise control.
Key Specifications include: a 12.3-inch wheelbase, adjustable caster blocks, and a three-gear transmission. The kit is compatible with standard 1/10 scale brushless motors and electronic speed controllers. It utilizes 12mm pre-glued tires and requires a 7.4V or 7.6V LiPo battery. The RC10B7’s focus on adjustability and high-quality components makes it a formidable competitor. Its robust design ensures longevity, even under demanding racing conditions, offering a superior driving experience for enthusiasts.

Assembly Instructions
Carefully follow these step-by-step instructions to build your RC10B7. Proper assembly is crucial for optimal performance and longevity of your racing machine.
Chassis Assembly
Begin by laying out all chassis components, verifying parts against the parts list. Assemble the main chassis plate, ensuring proper alignment of screw holes. Attach the front and rear chassis braces, utilizing threadlock on all screws to prevent loosening during operation. Pay close attention to the orientation of the braces – incorrect placement can affect handling.
Next, install the bulkhead components, again using threadlock. Ensure smooth movement of the suspension arms within the bulkheads; Carefully mount the battery posts and wire retainers, securing them firmly to the chassis. Double-check all screws for tightness, but avoid over-tightening, which could strip the threads. A properly assembled chassis forms the foundation for a high-performance RC10B7, ensuring durability and predictable handling characteristics on the track.
Suspension System Setup
Begin with assembling the shocks, filling them with appropriate shock oil and ensuring proper bladder or piston functionality. Mount the shocks to the chassis and suspension arms, utilizing the correct mounting hardware and ball cups. Install the suspension arms, checking for smooth and unrestricted movement. Adjust the pillow ball locations to modify camber and roll center settings.
Next, attach the sway bars, if desired, and adjust their stiffness to fine-tune handling. Proper spring selection is crucial; choose springs based on track conditions and driver preference. Verify that all suspension components move freely without binding. A well-tuned suspension system is vital for maximizing traction, stability, and overall performance of the RC10B7, adapting to various track surfaces and driving styles.
Steering System Installation
Start by assembling the steering rack, ensuring smooth movement of the steering linkages and proper ball cup installation. Mount the steering rack securely to the chassis, verifying alignment with the steering servo. Install the steering servo, centering it precisely and connecting it to the steering rack with a servo saver. Attach the steering links to the knuckles, adjusting the length to achieve desired steering throw.
Check for any binding or interference in the steering system’s range of motion. Adjust the endpoints on your transmitter to prevent over-steering or under-steering; Proper steering setup is critical for responsive handling and precise control of the RC10B7. Regularly inspect and maintain the steering components for optimal performance and longevity, adapting to different track conditions.
Drivetrain Assembly
Begin by assembling the gearbox, ensuring proper meshing of the gears for smooth and efficient power transfer. Install the bearings and shafts, lubricating them with high-quality grease to minimize friction and wear. Mount the gearbox securely to the chassis, aligning it with the motor and differential. Assemble the driveshafts, connecting them to the gearbox output shafts and wheel hubs.
Verify that the driveshafts spin freely without binding. The drivetrain is crucial for delivering power to the wheels. Pay close attention to gear ratio selection, impacting acceleration and top speed. Regularly inspect and maintain the drivetrain components, replacing worn parts promptly for consistent performance and reliability. Proper assembly and maintenance are vital for maximizing the RC10B7’s potential.
Differential Setup
The differential is a critical component, influencing the RC10B7’s handling characteristics. Begin by disassembling the differential, inspecting all parts for wear or damage. Clean and lubricate the gears and internal components with differential fluid of the appropriate viscosity. Reassemble the differential, ensuring proper gear mesh and smooth operation.
Adjust the differential’s limiting action using shims or adjustable screws, influencing how power is distributed to the wheels. A tighter differential provides more traction but can reduce cornering speed, while a looser differential enhances cornering but may sacrifice traction. Experiment with different settings to find the optimal balance for your track conditions and driving style. Regular maintenance, including fluid changes and gear inspection, is essential for consistent performance.
Gear Ratio Selection
Choosing the correct gear ratio is vital for maximizing the RC10B7’s performance on various tracks. A lower gear ratio (larger pinion gear, smaller spur gear) provides quicker acceleration and more torque, ideal for tight, technical tracks. Conversely, a higher gear ratio (smaller pinion, larger spur) delivers higher top speed, suited for larger, faster circuits.
Consider track length, surface grip, and your driving style when selecting a gear ratio. Start with a mid-range ratio and adjust based on observed performance. Monitor motor temperature; excessive heat indicates a gear ratio that is too high. Experimentation is key – test different combinations to find the sweet spot. Regularly inspect gears for wear and replace them as needed to maintain efficiency and prevent damage.

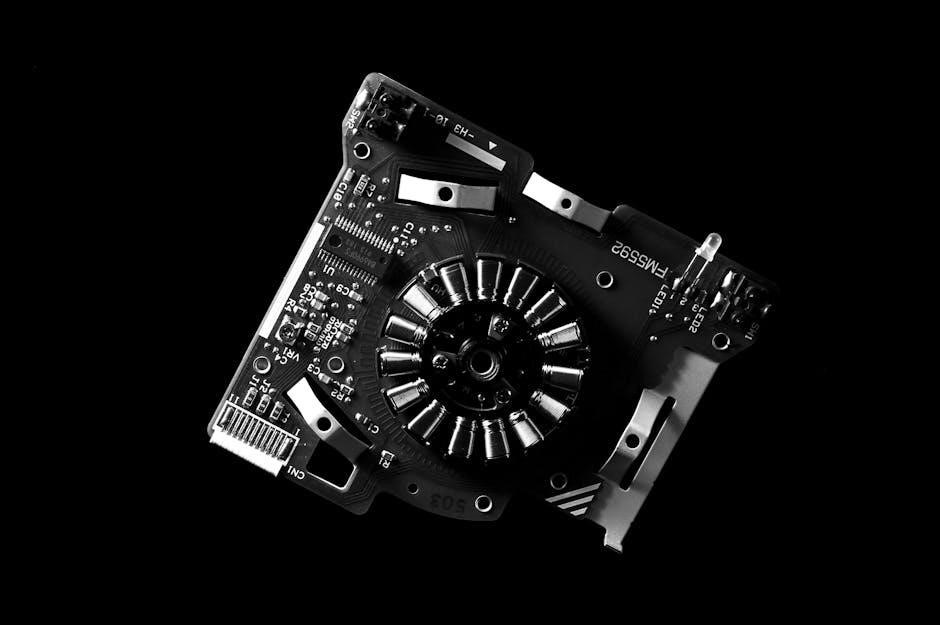
Electronic Components

This section details installing the motor, ESC, servo, and configuring the transmitter/receiver. Proper setup ensures optimal control and performance of your RC10B7.
Motor and ESC Installation
Carefully mount the motor to the motor mount using appropriate screws, ensuring proper alignment with the pinion gear. Secure the Electronic Speed Controller (ESC) in a location that allows for adequate airflow to prevent overheating, typically near the center of the chassis.
Connect the motor wires to the ESC, observing the correct polarity to ensure proper motor rotation. Solder the wires cleanly and insulate them with heat shrink tubing. Connect the ESC power wires to the battery connector, again paying attention to polarity.
Properly route and secure all wires to prevent interference with moving parts. Use zip ties or wire looms to keep the wiring neat and organized. Double-check all connections before applying power to avoid potential damage to the ESC or motor. Ensure the ESC is programmed correctly for your motor and battery type.
Servo Installation and Configuration
Mount the servo securely to the servo mount using the provided screws, ensuring it’s centered and doesn’t interfere with any chassis components. Connect the servo to the receiver using a compatible servo lead, paying attention to the correct orientation of the connector.
Install the servo saver to protect the servo gears from impact damage during crashes. Adjust the servo saver tension to provide adequate protection without sacrificing steering precision. Configure the servo’s endpoints and travel adjustment via your transmitter to match the RC10B7’s steering geometry.
Calibrate the servo to ensure accurate steering response and prevent binding. Verify the steering direction is correct and reverse it if necessary through the transmitter settings. Regularly check the servo’s operation and tighten any loose screws to maintain optimal performance.
Transmitter and Receiver Setup
Begin by binding the receiver to your transmitter, following the manufacturer’s instructions for both components. Ensure the transmitter is fully charged or has fresh batteries for a stable connection. Power on the receiver and connect it to the electronic speed controller (ESC) and steering servo using the appropriate channels.
Configure the transmitter settings, including dual rates, exponential, and steering reversal, to suit your driving style and track conditions. Calibrate the throttle and steering endpoints to maximize control and prevent unwanted movements. Assign auxiliary channels for optional functions like transponder activation.
Verify the receiver’s signal strength and range before operation. Regularly check the battery voltage of both the transmitter and receiver to avoid unexpected interruptions during a race. Securely mount the receiver within the chassis to protect it from damage.

Tuning and Maintenance
Regular maintenance and precise tuning are crucial for optimal RC10B7 performance. Adjust shock oil, springs, and tires to maximize handling and speed on various surfaces.
Shock Oil and Spring Selection
Optimizing shock performance is vital for RC10B7 handling. Shock oil viscosity directly impacts damping – thicker oil slows suspension movement, beneficial for bumpy tracks, while thinner oil allows quicker response on smoother surfaces. Experimentation is key! Begin with the kit-supplied oil and springs as a baseline.
Spring rates determine how readily the suspension compresses. Softer springs offer more grip on uneven terrain, absorbing bumps effectively, but may cause excessive body roll. Stiffer springs provide a more responsive feel and reduce roll, ideal for high-speed corners and smooth tracks. Consider track conditions and driving style when selecting springs.
Progressive rate springs offer a variable spring rate, providing a softer initial feel that ramps up as the suspension compresses. This can be a good compromise for varied track surfaces. Always ensure shocks are properly bled and sealed to maintain consistent performance. Regularly inspect springs for fatigue and replace as needed.
Tire Selection and Glueing
Tire choice dramatically affects RC10B7 grip and handling. Consider track surface – clay, carpet, or asphalt – and ambient temperature. Softer compounds offer maximum grip on smooth, warm surfaces, but wear quickly. Harder compounds provide durability on abrasive tracks and cooler conditions. Ribbed tires excel on carpet, while patterned tires suit dirt and asphalt.
Proper tire glueing is crucial for performance. Use a high-quality tire adhesive specifically designed for RC cars. Clean the tire and wheel thoroughly before applying glue. Apply a thin, even coat, ensuring full coverage of the tire sidewall. Avoid excessive glue, which adds unnecessary weight.

Allow the glue to fully cure before use. This typically takes several hours. Inspect glued tires for bubbles or imperfections. Rotate tires regularly to promote even wear and maximize lifespan. Consider using tire inserts to maintain shape and prevent sidewall flex.
Cleaning and Lubrication
Regular cleaning and lubrication are vital for maintaining RC10B7 performance and longevity. After each run, thoroughly clean the chassis with a soft brush and appropriate RC-specific cleaner to remove dirt, dust, and debris. Pay close attention to bearings, gears, and suspension components.
Lubricate bearings with a lightweight oil or grease. Avoid over-lubrication, as this attracts dirt. Apply grease sparingly to gears to ensure smooth operation. Silicone-based lubricants are ideal for shock shafts and suspension pivots. Regularly inspect and clean the drivetrain to prevent wear.
Check for loose screws and tighten as needed. Inspect wiring for damage and replace if necessary. Proper maintenance prevents premature wear and tear, ensuring consistent performance and reducing the risk of mechanical failures during competition.

Troubleshooting
This section provides solutions for common RC10B7 issues, including handling errors, identifying part failures, and offering a guide for efficient component replacement.
Common Issues and Solutions
Addressing typical RC10B7 challenges is crucial for consistent performance. A frequent problem involves inconsistent steering; check for loose linkages, proper servo centering, and correct steering trim settings. If experiencing traction rolling, adjust shock oil viscosity, spring rates, or consider tire compounds offering less grip. Motor overheating can occur – ensure adequate ventilation, verify gear mesh, and potentially reduce the gear ratio. Differential issues often manifest as unpredictable handling; disassemble, clean, and rebuild the differential with fresh fluid. Binding in the drivetrain requires careful inspection of bearings, axles, and gears. Regularly cleaning and lubricating these components is vital. Electronic glitches may stem from loose connections or low receiver battery voltage. Always double-check wiring and battery levels. Finally, tire ballooning can be resolved by reducing tire pressure or using tire inserts.
Parts Replacement Guide
Maintaining your RC10B7 necessitates timely parts replacement. Frequently replaced items include tires, which wear with use and require periodic changes based on track conditions. Suspension components, like shock shafts and pistons, may bend or wear, impacting damping performance. Arms and hubs are susceptible to damage from impacts, necessitating inspection after crashes. Bearings should be replaced when they feel rough or exhibit excessive play, ensuring smooth drivetrain operation. Gear mesh adjustments can wear gears over time, requiring eventual replacement. Regularly inspect and replace worn-out ball studs, turnbuckles, and linkages. Differential components, like outdrives and gears, can strip or break under stress. Always use high-quality replacement parts and follow the manufacturer’s recommendations for proper installation and torque specifications to ensure optimal performance and longevity.

Advanced Setup
Fine-tuning the RC10B7 involves adjusting roll centers, caster, and camber for optimal handling. These changes impact grip, steering, and overall track performance.
Adjusting Roll Centers
Roll center adjustments significantly influence the RC10B7’s handling characteristics, impacting both grip and responsiveness. Lowering the roll center generally increases grip, particularly on smoother surfaces, by allowing more independent suspension movement. Conversely, raising the roll center can reduce grip but enhance responsiveness and steering, proving beneficial on bumpy tracks.
Adjustments are typically made using shims placed under the suspension arms or by utilizing different hinge pin locations. Careful consideration should be given to front versus rear roll center adjustments; altering one end affects the balance of the chassis. Experimentation is key, as optimal settings depend heavily on track conditions, tire choice, and driving style. Documenting changes and observing their effects is crucial for consistent setup refinement. Small adjustments can yield noticeable improvements, so proceed methodically.
Optimizing Caster and Camber
Caster and camber are pivotal suspension settings impacting the RC10B7’s steering feel and tire contact patch. Increasing caster generally enhances steering response and stability, particularly at higher speeds, by promoting self-centering. However, excessive caster can make the steering heavier. Camber, the angle of the wheels relative to vertical, influences grip levels.
More negative camber maximizes tire contact during cornering, increasing grip, but can reduce straight-line traction. Adjustments are made using hinge pin inserts and shims. Track conditions dictate optimal settings; smoother tracks often benefit from less camber, while bumpy tracks require more. Experimentation is vital. Monitor tire wear to gauge camber effectiveness. Combine caster and camber adjustments to fine-tune steering and grip balance, achieving optimal performance for your driving style and the racing surface.