Danby Air Conditioner Remote Control Instructions: A Comprehensive Guide
Navigating Danby AC controls is now easier! This guide details remote functions, troubleshooting, and filter maintenance for models like DAC6010E, utilizing replacements like R15B․
Understanding Your Danby Remote: Model Numbers & Compatibility
Danby utilizes several remote control models, with the R15A, R15B, and R15C being the most frequently encountered․ Determining the correct model is crucial for full functionality․ The R15B is often cited as a versatile substitute, compatible with a broad range of Danby DAC series air conditioners – including DAC6010E, DAC8010E, and DAC12010E models․
However, it’s important to note that the R15B may lack certain features present in the original remotes, specifically the “Clean Air” and “Swing” functions․ Compatibility extends to some ArcticAire units as well․ When seeking a replacement, providing a picture of your existing remote to the seller is highly recommended to ensure a proper match, especially for less common Danby or ArcticAire equipment․
Identifying Common Danby Remote Models (R15A, R15B, R15C)
Danby’s remote control lineup primarily features three models: R15A, R15B, and R15C․ While visually similar, subtle differences exist in functionality․ The R15A and R15C are often superseded by the R15B due to its wider compatibility․ The R15B is frequently sold as a direct replacement for both the R15A and R15C, offering convenience for users needing a new remote․
However, users should be aware that opting for the R15B means potentially losing the dedicated “Clean Air” and “Swing” (airflow direction) buttons present on the original R15A or R15C remotes․ Identifying your original model number, often found on the remote itself, is recommended before purchasing a replacement to confirm feature alignment with your needs․
Compatibility with Danby Air Conditioner Models (DAC Series)
The R15B remote demonstrates broad compatibility across numerous Danby DAC series air conditioner models․ Confirmed compatible units include DAC6010E, DAC6011E, DAC8010E, DAC8011E, DAC10010E, DAC10011E, DAC12010E, and DAC12011E․ It also works with DAC5200DB, DAC060EB2GDB, DAC080EB2GDB, and DAC100EB2GDB models․
Furthermore, compatibility extends to DAC120EB2GDB, DAC150EB1GDB, DAC180EB1GDB, DAC250EB1GDB, DAC060ECB2GDB, and various other DAC and ArcticAire (AAC060EB1G, AAC080EB2G) units․ However, due to the wide range of Danby equipment, verifying compatibility with your specific model is crucial before purchasing․ Providing a picture of your existing remote to the seller is highly recommended for confirmation․
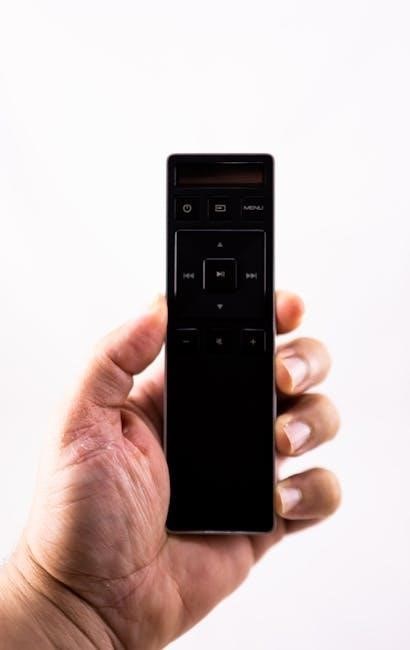
Remote Control Button Functions: Core Operations
Essential functions are readily accessible via your Danby remote․ The Power button initiates on/off operation․ The Mode button cycles through cooling, fan, dry, and auto settings․ Temperature control buttons adjust the desired room temperature, typically in one-degree increments․
Fan speed adjustments allow selection between low, medium, high, and auto fan speeds․ The oscillation function, controlled by a dedicated button, enables or disables side-to-side airflow․ Remember that replacement remotes like the R15B may lack certain features, such as the “Clean Air” and “Swing” functions, so functionality may vary depending on the remote model․
Power, Mode, and Temperature Control
Controlling your Danby AC starts with these core buttons․ The Power button is straightforward – it turns the unit on and off․ The Mode button allows you to select your desired climate setting: Cool, Fan, Dry, or Auto․ Cool mode actively cools the air, while Fan simply circulates air․ Dry mode reduces humidity, and Auto intelligently adjusts based on room temperature;
Temperature control is achieved using the Up and Down arrow buttons․ These adjust the target temperature, typically displayed in Fahrenheit․ Ensure the set temperature is comfortable and energy-efficient․ Remember that some replacement remotes, like the R15B, function effectively across numerous Danby DAC series models․
Fan Speed and Oscillation Settings
Fine-tune your comfort with fan speed and airflow control․ Danby remotes typically offer multiple fan speed settings – Low, Medium, and High – allowing you to balance cooling power with noise levels․ Lower speeds are quieter and consume less energy, while higher speeds provide maximum cooling․
The oscillation feature, often controlled by a dedicated button or the “Tree” symbol (discussed elsewhere), directs airflow side-to-side, distributing cool air more evenly throughout the room․ Some replacement remotes, like the R15B, may not include the swing function, so consider this when purchasing․ Adjusting these settings optimizes air circulation and personal comfort․
Advanced Features & Symbols Explained
Beyond basic operation, Danby remotes offer specialized functions․ The “Clean Air” function, if present on your model and remote (not available on all R15B replacements), enhances air quality by filtering dust and allergens․ The “Tree” symbol controls airflow direction – swing or fixed position – for targeted cooling․
Understanding these symbols is crucial for maximizing your AC’s performance․ The timer function allows for scheduled operation, conserving energy and ensuring comfort upon arrival or before bedtime․ Refer to your specific model’s manual for detailed explanations of all symbols and features, as functionality can vary between remotes and AC units․
Decoding the “Tree” Symbol (Swing/Airflow Direction)
The “Tree” symbol on your Danby remote controls the airflow direction, often referred to as “swing․” Pressing this button initiates an automatic oscillation, moving the air vents back and forth to distribute cool air more evenly throughout the room․
Repeated presses typically cycle through different swing modes: wide swing, narrow swing, and fixed position․ In fixed mode, the vents remain stationary, directing airflow in a single direction․ Note that some replacement remotes, like the R15B, may not include this swing function․ Understanding this symbol allows for personalized comfort and efficient cooling, tailoring the airflow to your specific needs and room layout․
Understanding the “Clean Air” Function (If Applicable)
The “Clean Air” function, if present on your Danby remote, activates an air purification mode within the air conditioner․ This feature typically utilizes a filter to remove dust, pollen, and other airborne particles, improving indoor air quality alongside cooling․
However, it’s crucial to note that not all Danby remote models – particularly replacement options like the R15B – support this function․ The R15B is explicitly stated as lacking the “Clean Air” capability․ If your original remote had this feature and you’ve switched to an R15B, you’ll lose that functionality․ Regularly cleaning your air filter is still essential for optimal performance, regardless of whether the “Clean Air” mode is available․
Utilizing the Timer Function for Scheduled Operation
Danby air conditioner remotes often include a timer function, allowing for convenient scheduled operation․ This feature enables you to set a specific time for the unit to automatically turn on or off, conserving energy and ensuring comfort․ The exact method for setting the timer varies slightly depending on the remote model, but generally involves pressing a “Timer” button and then using the number pad to input the desired time․
Consult your Danby air conditioner’s manual for precise instructions tailored to your specific model․ Remember that some replacement remotes, like the R15B, may have slightly different timer functionalities compared to the original remote․ Proper timer setup can significantly enhance the efficiency and convenience of your Danby AC unit․
Troubleshooting Common Remote Control Issues
Encountering issues with your Danby remote? The most frequent problem is unresponsive buttons, often due to depleted batteries․ Always begin by checking and replacing the batteries with fresh ones․ If the remote still fails to function, ensure there’s a clear line of sight between the remote and the air conditioner’s sensor – obstructions can interfere with the signal․
For remotes that aren’t responding at all, consider if pairing is required (though not all models need this)․ Button malfunctions can sometimes occur; gently cleaning the remote may help․ If problems persist, exploring replacement options, like the commonly available R15B, might be necessary․ Remember to verify compatibility before purchasing a new remote․
Remote Not Responding: Battery Check & Replacement
Is your Danby remote failing to communicate with the AC unit? The first and most crucial step is a battery check․ Weak or dead batteries are the primary cause of a non-responsive remote․ Open the battery compartment (usually on the back) and inspect the batteries for corrosion or damage․
Replace all batteries simultaneously with fresh ones of the correct type (typically AAA or AA)․ Ensure proper polarity – match the positive (+) and negative (-) ends as indicated․ After replacement, re-test the remote․ If it still doesn’t work, double-check battery installation and consider the possibility of a faulty remote requiring replacement, potentially with a compatible model like the R15B․
Remote Control Pairing (If Required)
Most Danby air conditioner remotes operate immediately without pairing, however, some models may require a pairing process, particularly after battery replacement or if experiencing intermittent connectivity․ Consult your specific Danby AC model’s manual for pairing instructions, as the procedure varies․
Generally, pairing involves pressing and holding a specific combination of buttons on the remote while simultaneously powering on the air conditioner․ The manual will detail the exact button sequence․ If your remote lacks a pairing function, or the pairing process fails, a replacement remote (like the R15B) might be necessary․ Confirm compatibility before purchasing a new remote to ensure proper functionality․
Addressing Button Malfunctions
Sticky or unresponsive buttons on your Danby remote are common issues․ First, attempt a simple reset: remove the batteries, wait several minutes, and reinsert them․ If a specific button consistently fails, gently clean around it with a cotton swab lightly dampened with isopropyl alcohol – ensure the remote is powered off first!
Avoid excessive force when pressing buttons․ If cleaning doesn’t resolve the issue, internal contact corrosion might be the cause․ While disassembly can sometimes fix this, it risks further damage․ In many cases, a malfunctioning button signals the need for a replacement remote․ The R15B is often a suitable substitute, but verify compatibility with your Danby model․
Replacing Your Danby Remote Control
When your Danby remote fails, replacement is often the most practical solution․ The R15B model is frequently cited as a compatible substitute for R15A and R15C, working across numerous DAC series air conditioners (DAC6010E, DAC8011E, etc․)․ However, confirm compatibility with your specific Danby model before purchasing․
Amazon․com and other online retailers are common sources․ Be aware that the R15B may lack the “Clean Air” and “Swing” functions present on some original remotes․ Consider if these features are essential to your needs․ Universal remotes are also an option, but programming can be complex․ Providing a picture of your old remote to the seller can help ensure you receive a suitable replacement․
Finding Replacement Remotes (R15B as a Common Substitute)
Locating a replacement Danby remote is often straightforward, with the R15B emerging as a widely compatible option․ It’s known to function with a broad range of Danby and ArcticAire models, including DAC6010E, DAC8010E, and DAC120EB2GDB․ Amazon․com is a primary source, offering the R15B specifically marketed as a substitute for R15A and R15C․
However, exercise caution․ The R15B doesn’t replicate all original functions – specifically, the “Clean Air” and “Swing” features may be absent․ Before purchasing, verify compatibility by checking model lists or, ideally, contacting the seller with your original remote’s picture for confirmation․ This ensures a functional, albeit potentially slightly limited, replacement․
Confirming Compatibility Before Purchasing
Prior to buying a replacement Danby remote, meticulous compatibility verification is crucial․ While the R15B is frequently advertised as a universal substitute for R15A and R15C, relying solely on model numbers isn’t foolproof․ Danby and ArcticAire manufacture numerous units, and subtle variations exist․
The most reliable method involves directly comparing your existing remote to product images or, ideally, submitting a photograph of your current remote to the seller․ Many online retailers, like those on Amazon, encourage this practice․ This proactive step minimizes the risk of purchasing an incompatible remote, saving you time and potential frustration․ Remember, even within the DAC series, specific sub-models may require unique remotes․
Alternative Remote Options & Universal Remotes
Beyond direct Danby replacements, exploring universal remotes presents a viable solution․ These remotes are designed to control multiple devices, including air conditioners, from various brands․ However, programming a universal remote for a Danby AC requires careful attention to code lists and device setup․
Success isn’t guaranteed, as universal remote databases may not encompass every Danby model․ Thoroughly check the universal remote’s compatibility list before purchasing․ If a direct Danby replacement proves elusive, a universal remote, properly configured, can offer a functional alternative․ Consider the features you require – some universal remotes may lack specific Danby functions like the “Clean Air” or “Swing” modes․
Cleaning and Maintaining Your Remote Control
Regular cleaning extends the life of your Danby remote and ensures optimal performance․ Disconnect batteries before cleaning! Use a slightly damp, lint-free cloth to wipe the exterior․ Avoid harsh chemicals or abrasive cleaners, as these can damage the buttons and casing․
For stubborn grime, a cotton swab lightly dampened with isopropyl alcohol can be used cautiously around buttons․ Ensure no liquid enters the remote’s interior․ Store batteries separately in a cool, dry place to prevent corrosion․ Protect the remote from drops, extreme temperatures, and direct sunlight․ Proper care minimizes malfunctions and keeps your AC control functioning reliably․
Proper Cleaning Procedures to Extend Lifespan
Maintaining your Danby remote’s longevity requires consistent, gentle cleaning․ Begin by removing the batteries to prevent accidental operation and potential damage․ Use a soft, dry cloth to dust the remote’s surface regularly․ For deeper cleaning, slightly dampen a lint-free cloth with water – never spray liquid directly onto the remote․
Avoid harsh chemicals, solvents, or abrasive cleaners․ A cotton swab dipped in isopropyl alcohol can carefully clean around buttons, ensuring no liquid seeps inside․ Dry thoroughly before reinserting batteries․ This prevents corrosion and ensures reliable button responsiveness, maximizing the remote’s lifespan and your cooling comfort․
Battery Storage and Disposal Guidelines
Proper battery handling is crucial for safety and environmental responsibility․ When removing batteries for extended storage or disposal, ensure they are not mixed with used batteries․ Store new and used batteries in a cool, dry place, away from metal objects to prevent short circuits․
Always dispose of batteries responsibly, following local regulations for battery recycling; Many communities offer designated drop-off locations for used batteries․ Never discard batteries in regular household waste․ This protects the environment and prevents potential hazards․ Consider using rechargeable batteries to reduce waste and save money long-term․
Protecting the Remote from Damage
Safeguarding your Danby remote extends its lifespan and ensures consistent operation․ Avoid dropping the remote, as internal components are sensitive to impact․ Keep it away from direct sunlight and excessive heat sources, which can warp the plastic casing and damage the electronics․
Protect against liquid spills by keeping drinks and other liquids away from the remote․ If the remote does get wet, immediately remove the batteries and allow it to dry completely before attempting to use it again․ Consider a protective case or cover to shield the remote from dust, scratches, and accidental damage during storage or use․
Danby Air Conditioner Filter Access & Cleaning

Maintaining a clean filter is crucial for optimal Danby AC performance and air quality․ Begin by locating the front panel – typically it lifts or slides upwards to reveal the filter․ Gently remove the filter, noting its orientation for correct reinstallation․
Vacuum the filter to remove loose dust and debris, then wash it with mild soap and water․ Ensure the filter is completely dry before placing it back into the unit․ A clogged filter restricts airflow, reducing cooling efficiency and potentially damaging the AC․ Regular cleaning, ideally every two weeks during peak use, ensures efficient operation and extends the lifespan of your Danby air conditioner․
Locating and Removing the Front Panel
Accessing the air filter begins with locating and removing the Danby air conditioner’s front panel․ Most Danby models, such as the DAC080B5WDB, feature a panel that lifts or slides upwards․ Carefully examine your unit to identify the release mechanism – it might involve tabs, buttons, or a simple lifting motion․
Gently lift or slide the front panel upwards, avoiding excessive force․ Some models may have clips that require a slight release․ Once the panel is free, it will swing open, exposing the air filter․ Remember to support the panel during removal to prevent it from falling․ Proper removal ensures easy access for filter cleaning and maintenance, contributing to optimal AC performance․
Cleaning the Air Filter for Optimal Performance
Regular filter cleaning is crucial for maintaining your Danby air conditioner’s efficiency and air quality․ Once removed, the filter should be vacuumed to remove loose dust and debris․ For a deeper clean, gently wash the filter with mild soap and lukewarm water․
Avoid harsh chemicals or abrasive cleaners, as these can damage the filter material․ After washing, thoroughly rinse the filter and allow it to air dry completely before reinstalling․ A clogged filter restricts airflow, forcing the unit to work harder and reducing cooling performance․ Cleaning the filter every two weeks during peak usage ensures optimal operation and extends the lifespan of your Danby AC․
Reassembling the Front Panel
After the air filter is completely dry, carefully slide it back into its designated slot within the Danby air conditioner․ Ensure the filter sits securely and is properly aligned to prevent any gaps․ Next, gently reattach the front panel, aligning the tabs or clips with their corresponding slots on the unit’s housing․
Apply even pressure across the panel to snap it securely into place․ Avoid forcing the panel, as this could damage the clips or the panel itself․ A properly reassembled front panel ensures efficient airflow and prevents dust and debris from entering the unit․ Verify a snug fit all around the perimeter before resuming operation․