Welcome to the URC A6 User Manual, your comprehensive guide to mastering the Universal Remote Control A6. This manual is designed to help you effortlessly program and operate your remote, ensuring seamless control of your home entertainment and other compatible devices. Inside, you’ll find step-by-step instructions, troubleshooting tips, and detailed explanations of advanced features. Whether you’re setting up for the first time or optimizing your experience, this manual provides everything you need to get the most out of your URC A6.

H2: Installation and Setup
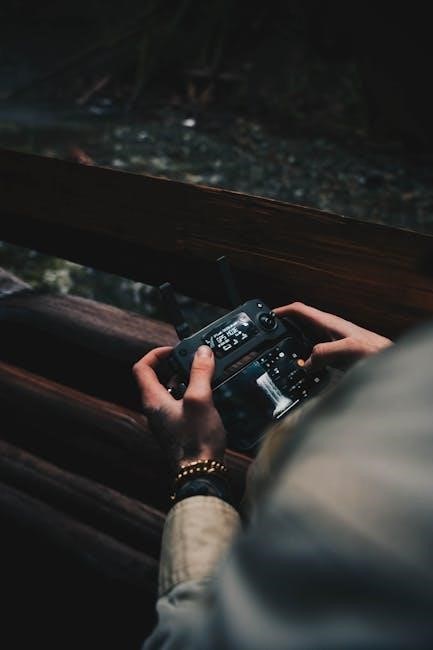
Installing and setting up your URC A6 remote control is a straightforward process that ensures seamless integration with your devices. Begin by inserting the batteries into the remote. Open the battery compartment, located on the back, and insert two AA alkaline batteries, making sure to align the positive and negative terminals correctly. Once the batteries are in place, the remote is ready for initial setup.
Syncing the Remote with Your Devices
To use the URC A6 with your devices, you’ll need to program it by either entering device codes or using the learning feature. Start by pressing and holding the Setup button until the LED light blinks twice, indicating the remote is in setup mode. Next, press the Mode button corresponding to the type of device you want to control (e.g., TV, DVD, or AUX). Enter the specific code for your device using the number pad. If the code is correct, the LED will blink twice. If the code doesn’t work, repeat the process with an alternate code until the device responds.
Understanding the Mode Buttons
The URC A6 features dedicated mode buttons for common device types, such as TV, DVD, and AUX. These buttons help organize the remote’s functionality, ensuring that each button corresponds to the correct device. For example, pressing the TV button will activate commands specific to your television, such as changing channels or adjusting the volume. Similarly, the DVD button will control playback functions for your DVD player or other media devices.
LED Indicators and Battery Life
The URC A6 includes an LED indicator that provides feedback during setup and operation. The LED will flash once when a button is pressed and twice when a code is successfully entered. If the batteries are low, the LED will blink three times rapidly when you press the Power button. Replace the batteries promptly to maintain optimal performance. High-quality alkaline batteries are recommended for extended usage.
Troubleshooting Initial Setup
If you encounter issues during setup, ensure that the batteries are fresh and properly installed. If a device code doesn’t work, try an alternate code or use the learning feature to teach the remote the commands from your device’s original remote. Keep the remote within a reasonable distance from the device during setup and operation, as physical obstructions or interference from other electronics can affect performance.
By following these steps, you’ll have your URC A6 remote control fully installed and set up, ready to streamline your entertainment experience. Proper installation ensures reliable operation and maximizes the remote’s functionality.

H2: Programming the URC A6
Programming the URC A6 remote control is a simple yet powerful process that allows you to customize its functionality to work seamlessly with your devices. Whether you’re setting up a new device or fine-tuning existing controls, the URC A6 offers flexible options to meet your needs.
Step-by-Step Programming Guide
Entering Setup Mode: Press and hold the Setup button until the LED light blinks twice. This indicates that the remote is ready to accept programming commands.
Selecting the Device Type: Press the Mode button corresponding to the device you want to control (e.g., TV, DVD, AUX). The LED will blink once to confirm your selection.
Entering the Device Code: Use the number pad to enter the specific code for your device. The code can be found in the manual or online. If the code is correct, the LED will blink twice. If the code doesn’t work, repeat the process with an alternate code until the device responds.
Using the Learning Feature
If your device does not have a predefined code, or if you prefer a more customized setup, you can use the learning feature to teach the URC A6 commands from your device’s original remote control.
Syncing the Remotes: Place the URC A6 and your device’s original remote on a flat surface, facing each other. Ensure they are within a few inches of each other for optimal signal transmission.
Capturing Commands: Press and hold the Setup button on the URC A6 until the LED blinks twice. Then, press the desired button on your original remote to capture its command. The LED will blink once to confirm the command has been learned.
Saving Commands: Repeat the process for all necessary buttons. Once complete, press the Setup button to exit learning mode. The URC A6 will now control your device with the learned commands.
Tips for Successful Programming
– Ensure the batteries are fresh and properly installed before programming.
– If a code doesn’t work, try an alternate code from the manual or online database.
– When using the learning feature, maintain a clear line of sight between the remotes and avoid interference from other electronic devices.
Troubleshooting
If you encounter issues during programming, check the following:
- Verify that the device codes are correct and specific to your device model.
- Ensure the LED responds appropriately during setup (e.g., blinking twice for a successful code entry).
- If the learning feature fails, try repositioning the remotes or replacing the batteries in the original remote.
By following these steps and tips, you can easily program your URC A6 to control all your devices. Whether you’re using predefined codes or teaching the remote new commands, the URC A6 offers the flexibility and reliability you need for a seamless entertainment experience.

H2: Using the URC A6
The URC A6 remote control is designed to provide intuitive and seamless control over your home entertainment system. Once programmed, the remote offers a user-friendly interface that simplifies the operation of multiple devices. This section will guide you through the essential features and functionalities of the URC A6, ensuring you get the most out of your remote control.
Selecting Your Device

To control a specific device, press the corresponding component button (e.g., TV, DVD, or AUX) located at the top of the remote. Once selected, all buttons on the URC A6 will operate the chosen device. For instance, pressing the TV button enables all controls to function with your television, while pressing the DVD button switches control to your DVD player.
Navigating Menus and Channels
The URC A6 features a responsive navigation system with directional buttons (Left, Right, Up, Down) that allow you to scroll through menus, adjust settings, or change channels effortlessly. Additionally, the number pad provides quick access to specific channels or menu options, making it convenient to navigate your favorite programs or settings.
Low Battery Warning
The URC A6 includes a low battery warning system to ensure uninterrupted use. When the batteries are running low, the component LED will blink three times rapidly when you press the Power button. This feature gives you ample time to replace the batteries before the remote becomes unresponsive.
Learning Feature
If your device does not have a predefined code, the URC A6 offers a learning feature that allows it to capture commands from your device’s original remote control. By positioning the two remotes appropriately and following the steps outlined in the manual, you can teach the URC A6 to recognize and replicate the necessary commands for seamless operation.
Optimizing Your Experience
To maximize the performance of your URC A6, ensure that the remote is used within a clear line of sight of your devices. Avoid physical obstructions, as they may interfere with the infrared signal. Regularly cleaning the remote’s sensors and replacing batteries when needed will also help maintain optimal functionality.
The URC A6 is more than just a remote control; it’s a central hub for your home entertainment system. With its intuitive design, versatile features, and user-friendly interface, the URC A6 makes it easy to enjoy a seamless and enhanced viewing experience. By familiarizing yourself with its controls and customization options, you can unlock the full potential of your URC A6 and take your entertainment to the next level.

H2: Advanced Features
The URC A6 remote control is equipped with a range of advanced features designed to enhance your control experience and provide greater flexibility in managing your home entertainment system. These features allow you to customize and optimize the remote’s functionality to suit your specific needs.
Macro Commands
One of the standout advanced features of the URC A6 is its ability to execute macro commands. A macro is a sequence of commands that can be triggered with a single button press. For example, you can program a macro to turn on your TV, switch to the correct input, and adjust the volume simultaneously. This feature is particularly useful for simplifying complex operations and creating a seamless entertainment experience.
Custom Button Mapping
The URC A6 allows you to reassign buttons to better suit your preferences. If you find that certain buttons are not frequently used or could be more conveniently placed, you can remap them to functions that are more relevant to your usage. This level of customization ensures that the remote becomes an extension of your personal control preferences, making it easier to navigate and use;
The URC A6 includes a learning feature that enables it to capture and replicate commands from other remote controls. This is especially useful for devices that do not have predefined codes in the URC A6 database. By teaching the remote the specific commands from your device’s original remote, you can ensure comprehensive control over all your components, even if they are not natively supported by the URC A6.
IR Signal Optimization
The URC A6 is designed to deliver reliable performance, even in environments with potential interference. The remote’s infrared (IR) signal can be optimized to ensure strong and consistent communication with your devices. By adjusting the angle and distance between the remote and your devices, you can maximize the effectiveness of the IR signal and enjoy uninterrupted control.
Advanced Device Integration
The URC A6 supports advanced integration with a wide range of devices, including smart TVs, streaming devices, and home theaters. This allows you to consolidate control of your entire entertainment system into a single remote, eliminating the need to juggle multiple controllers. The remote’s compatibility with various device types ensures a unified and streamlined control experience.
The advanced features of the URC A6 remote control make it a powerful and versatile tool for managing your home entertainment system. From macro commands and custom button mapping to the learning feature and IR signal optimization, these capabilities empower you to tailor the remote to your unique needs. By leveraging these features, you can unlock the full potential of the URC A6 and enjoy a more convenient, efficient, and enjoyable entertainment experience.

H2: Troubleshooting and Maintenance
Like any electronic device, the URC A6 remote control may occasionally encounter issues that require troubleshooting. This section provides guidance on identifying and resolving common problems, as well as tips for maintaining your remote to ensure optimal performance.
Common Issues and Solutions
If your URC A6 remote is not functioning as expected, there are several steps you can take to diagnose and resolve the issue:
- Low Battery Warning: If the component LED blinks three times when you press the Power button, it indicates low battery levels. Replace the batteries with fresh ones to restore functionality.
- IR Signal Interference: Ensure there are no obstacles between the remote and your device. Infrared signals can be blocked by objects or reflective surfaces, so try adjusting the angle or distance for better communication.
- Incorrect Device Codes: If the remote is not controlling a device properly, it may be using the wrong code. Refer to the manual or the URC website to find the correct code for your device and reprogram the remote accordingly.
- Button Malfunction: If specific buttons are unresponsive, clean them with a soft cloth and mild cleaning solution. Avoid using harsh chemicals that could damage the buttons or the remote’s surface.
Maintenance Tips
Regular maintenance can help extend the life of your URC A6 remote and prevent potential issues:
- Clean the Remote: Use a soft, dry cloth to wipe down the remote, paying particular attention to the buttons and IR sensor. Avoid exposing the remote to excessive moisture or humidity.
- Replace Batteries Promptly: Always use high-quality batteries and replace them as soon as you notice a decrease in performance. Avoid mixing old and new batteries, as this can reduce the remote’s reliability.
- Update Firmware (if applicable): Check the URC website for any firmware updates for your remote. Updating the firmware can resolve software-related issues and add new features or improvements.
- Store Properly: When not in use, store the remote in a protective case or a safe location to prevent physical damage or scratches.
Advanced Troubleshooting
If basic troubleshooting steps do not resolve the issue, you may need to perform a factory reset or consult the URC A6 manual for more detailed instructions. A factory reset will erase all programmed settings, so be sure to have your device codes handy before proceeding.
By following these troubleshooting and maintenance tips, you can ensure your URC A6 remote continues to function optimally and provides reliable control over your devices. Regular care and attention will help maintain its performance and extend its lifespan.

H2: Conclusion
The URC A6 remote control is a powerful and versatile tool designed to streamline your home entertainment experience. With its intuitive interface, advanced learning capabilities, and compatibility with a wide range of devices, the URC A6 offers unparalleled control and convenience. This user manual has guided you through the essential steps of installation, programming, and operation, ensuring you can maximize the potential of your remote.
One of the standout features of the URC A6 is its ability to learn from other remotes, allowing you to consolidate control of multiple devices into a single, user-friendly interface. This feature, combined with its robust compatibility with brands like Sony and Apple TV, makes the URC A6 an excellent choice for modern home entertainment systems. Additionally, the remote’s solid build quality and responsive buttons ensure a satisfying user experience.
Throughout this manual, we’ve emphasized the importance of proper setup and maintenance to ensure optimal performance. Regular battery replacement, cleaning, and firmware updates (if applicable) will help extend the lifespan of your remote and prevent common issues. Should you encounter any problems, the troubleshooting section provides clear, step-by-step solutions to get you back up and running quickly.
The URC A6 is more than just a remote control—it’s a central hub for your entertainment system. By following the guidelines in this manual, you’ll be able to program, customize, and maintain your remote with ease. Whether you’re a tech-savvy user or someone looking for a simple, reliable solution, the URC A6 delivers exceptional performance and value.